Guides- Dockers - LXC
Guides for several self hosting at Docker containers or LXC and even bare metal.
- Immich docker-compose.yml
- How to Install & Configure TURN Server (coTURN)
- Install RustDesk Server docker-compose.
- RAG + Embedding with AnythingLLM and Ollama
- Install Ntfy server on Debian linux.
- Εγκατάσταση του Caddy reverse proxy σε LXC container στο Proxmox.
- Install a full samba share on Debian.
Immich docker-compose.yml
Installing
For installing Immich with a docker container follow the below instructions.
Step 1 - Making directory
Go to the docker folder where you create your containers and make a folder.
mkdir immich-app
cd immich-app
Step 2 - Create the docker-compose.yml
nano docker-compose.ymland copy paste the below yaml config, you can change it according to your needs.
#
# WARNING: To install Immich, follow our guide: https://immich.app/docs/install/docker-compose
#
# Make sure to use the docker-compose.yml of the current release:
#
# https://github.com/immich-app/immich/releases/latest/download/docker-compose.yml
#
# The compose file on main may not be compatible with the latest release.

name: immich

services:
  immich-server:
    container_name: immich_server
    image: ghcr.io/immich-app/immich-server:${IMMICH_VERSION:-release}
    # extends:
    #   file: hwaccel.transcoding.yml
    #   service: cpu # set to one of [nvenc, quicksync, rkmpp, vaapi, vaapi-wsl] for accelerated transcoding
    labels:
      - "com.centurylinklabs.watchtower.enable=false"
    deploy:
      resources:
        limits:
          cpus: '1'
          memory: 4096M
        reservations:
          cpus: '1'
          memory: 4096M
    volumes:
      # Do not edit the next line. If you want to change the media storage location on your system, edit the value of UPLOAD_LOCATION in the .env file
      - ${UPLOAD_LOCATION}:/usr/src/app/upload
      - /etc/localtime:/etc/localtime:ro
    env_file:
      - .env
    ports:
      - '2283:2283'
    depends_on:
      - redis
      - database
    restart: always
    healthcheck:
      disable: false

  immich-machine-learning:
    container_name: immich_machine_learning
    # For hardware acceleration, add one of -[armnn, cuda, openvino] to the image tag.
    # Example tag: ${IMMICH_VERSION:-release}-cuda
    image: ghcr.io/immich-app/immich-machine-learning:${IMMICH_VERSION:-release}
    # extends: # uncomment this section for hardware acceleration - see https://immich.app/docs/features/ml-hardware-acceleration
    #   file: hwaccel.ml.yml
    #   service: cpu # set to one of [armnn, cuda, openvino, openvino-wsl] for accelerated inference - use the `-wsl` version for WSL2 where applicable
    labels:
      - "com.centurylinklabs.watchtower.enable=false"
    deploy:
      resources:
        limits:
          cpus: '1'
          memory: 4096M
        reservations:
          cpus: '1'
          memory: 4096M
    volumes:
      - model-cache:/cache
    env_file:
      - .env
    restart: always
    healthcheck:
      disable: false

  redis:
    container_name: immich_redis
    image: docker.io/redis:6.2-alpine@sha256:148bb5411c184abd288d9aaed139c98123eeb8824c5d3fce03cf721db58066d8
    labels:
      - "com.centurylinklabs.watchtower.enable=false"
    deploy:
      resources:
        limits:
          cpus: '1'
          memory: 4096M
        reservations:
          cpus: '1'
          memory: 4096M
    healthcheck:
      test: redis-cli ping || exit 1
    restart: always

  database:
    container_name: immich_postgres
    image: docker.io/tensorchord/pgvecto-rs:pg14-v0.2.0@sha256:90724186f0a3517cf6914295b5ab410db9ce23190a2d9d0b9dd6463e3fa298f0
    labels:
      - "com.centurylinklabs.watchtower.enable=false"
    deploy:
      resources:
        limits:
          cpus: '1'
          memory: 4096M
        reservations:
          cpus: '1'
          memory: 4096M
    environment:
      POSTGRES_PASSWORD: ${DB_PASSWORD}
      POSTGRES_USER: ${DB_USERNAME}
      POSTGRES_DB: ${DB_DATABASE_NAME}
      POSTGRES_INITDB_ARGS: '--data-checksums'
    volumes:
      # Do not edit the next line. If you want to change the database storage location on your system, edit the value of DB_DATA_LOCATION in the .env file
      - ${DB_DATA_LOCATION}:/var/lib/postgresql/data
    healthcheck:
      test: >-
        pg_isready --dbname="$${POSTGRES_DB}" --username="$${POSTGRES_USER}" || exit 1;
        Chksum="$$(psql --dbname="$${POSTGRES_DB}" --username="$${POSTGRES_USER}" --tuples-only --no-align
        --command='SELECT COALESCE(SUM(checksum_failures), 0) FROM pg_stat_database')";
        echo "checksum failure count is $$Chksum";
        [ "$$Chksum" = '0' ] || exit 1
      interval: 5m
      start_interval: 30s
      start_period: 5m
    command: >-
      postgres
      -c shared_preload_libraries=vectors.so
      -c 'search_path="$$user", public, vectors'
      -c logging_collector=on
      -c max_wal_size=2GB
      -c shared_buffers=512MB
      -c wal_compression=on
    restart: always

volumes:
  model-cache:
To save and exit do the follow
press Ctrl + x and the press y and enter
Step 3 - Create and populate the .env file with custom values
nano .envand copy paste the below yaml config, you can change it according to your needs.
# You can find documentation for all the supported env variables at https://immich.app/docs/install/environment-variables

# The location where your uploaded files are stored
UPLOAD_LOCATION=./library
# The location where your database files are stored
DB_DATA_LOCATION=./postgres

# To set a timezone, uncomment the next line and change Etc/UTC to a TZ identifier from this list: https://en.wikipedia.org/wiki/List_of_tz_database_time_zones#List
TZ=Europe/Athens

# The Immich version to use. You can pin this to a specific version like "v1.71.0"
IMMICH_VERSION=release

# Connection secret for postgres. You should change it to a random password
# Please use only the characters `A-Za-z0-9`, without special characters or spaces
DB_PASSWORD=yourpasswordhere

# The values below this line do not need to be changed
###################################################################################
DB_USERNAME=postgres
DB_DATABASE_NAME=immich
To save and exit do the follow
press Ctrl + x and the press y and enter
Step 4 - Start the containers
Start the containers
docker compose up -dCheck the logs if there are any errors.
Upgrading
Step 1 - Stop the containers
Go to the folder where is the immich-app and run the below commands.
docker compose downStep 2 - Upgrade and restart Immich
When a new version of Immich is released, the application can be upgraded and restarted with the following commands, run in the directory with the docker-compose.yml file:
docker compose pull && docker compose up -dStep 3 - Clean up unused Docker images (optional)
To clean up disk space, the old version's obsolete container images can be deleted with the following command:
docker image pruneThat's it you immich-app is now upgraded.
If you find this useful please leave a comment.
Ins0mniA
How to Install & Configure TURN Server (coTURN)
Install coTURN Server
Audio / Video based services requires a wide range of UDP ports to be available for WebRTC. In some network restricted sites, such as those behind NAT or a firewall that restricts outgoing UDP connections, users may be unable to make outgoing UDP connections to your media server.
TURN protocol is designed to allow UDP communication flows to bypass NAT or firewalls by forcing the client to connect to the TURN server, and then force TURN server to connect to the destination on their behalf.
Using a TURN server under your control improves the success of connections to your multimedia application and also improves user privacy, since it acts like a proxy so that peers will no longer be sending their IP address information to a public STUN server.
Required Hardware
TURN protocol is not really CPU or memory intensive. Additionally, since it’s only used during connection setup (for STUN) and as a fallback for users who would otherwise be unable to connect, the bandwidth requirements aren’t particularly high. For a moderate number of connections, a single small VPS configuration is usually enough. Here you can find my reccomendations to install coTURN:
At least two vCPUs
4GB Memory.
20GB HDD. SSD can be used, but not mandatory.
The most important thing is the networking performance.
Low jitter (less than 30ms)
Low latency (less than 150ms)
Enough bandwidth to handle relayed media streams in both directions.
Having the server behind NAT (like on Amazon EC2) is OK, but all incoming UDP and TCP connections on any port (TCP 80 & 443, UDP 3478, 10000-20000) must be forwarded to coTURN server and not firewalled.
Required Software
I recommend using a minimal server installation of Debian with netinst or Ubuntu. Since coTURN software uses port TCP 443, the server which coTURN will be installed cannot have any other web applications running.
coTURN is already available in the Debian and Ubuntu repositories and it can be installed with apt-get:
sudo apt-get update
sudo apt-get install coturn
Please note that coTURN will not start automatically until the configuration is finished. You can find the configuration tasks in below.
DNS Entry For coTURN
You can use certbot to generate free TLS certificates from Let’s Encrypt. To setup certbot, enter the following commands on your coTURN server:
sudo add-apt-repository ppa:certbot/certbot
sudo apt-get update
sudo apt-get install certbotNote: If you face with add-apt-repository command not found error, please use sudo apt-get install software-properties-common command to install the necessary packets.
sudo apt-get install software-properties-commonYou can then run a certbot command like the following to generate the certificate, replacing turn.you-domain.com with the domain name of your TURN server:
sudo certbot certonly --standalone --preferred-challenges http \
    --deploy-hook "systemctl restart coturn" \
    -d turn.you-domain.com
Current versions of the certbot command set up automatic renewal by default. Note that when certbot renews the certificate, it will restart coTURN service, so coTURN will start to use the updated certificate files. This will cause an interruption on any ongoing TURN connections. You may change the certbot renewal schedule or disable automatic renewal if you like.
Configure coTURN
coTURN configuration is stored in /etc/turnserver.conf file. There are a lot of options and all of them are documented in comments in that file. I include a sample configuration below with comments as the recommended settings, also with notes in places where customization is needed.
You can replace the contents /etc/turnserver.conf with the file below and make these changes:
nano /etc/turnserver.conf- Replace turn.you-domain.com with the hostname of your TURN server
- Change the values in bold with your choices.You can see an example config file below:
You can see an example config file below:
server-name=turn.you-domain.com
realm=turn.you-domain.com
cert=/etc/letsencrypt/live/turn.you-domain.com/cert.pem
pkey=/etc/letsencrypt/live/turn.you-domain.com/privkey.pem
fingerprint
listening-ip=0.0.0.0
external-ip= 1.2.3.4/192.168.0.1 #or just write the external ip
listening-port=3478
min-port=10000
max-port=20000
log-file=/var/log/turnserver.log
verbose
lt-cred-mech
user=myusername:mypassword
You MUST change the below settings according to your setup.
server-name=turn.you-domain.com
realm=turn.you-domain.com
cert=/etc/letsencrypt/live/turn.you-domain.com/cert.pem
pkey=/etc/letsencrypt/live/turn.you-domain.com/privkey.pem
external-ip= 1.2.3.4/192.168.0.1 #or just write the external ip
user=myusername:mypassword
You can now start the COTURN service with this command:
systemctl start coturnRunning coTURN as a Service
The Debian / Ubuntu package for coTURN requires that you edit a file to enable at startup. Edit /etc/default/coturn file
nano /etc/default/coturnand uncomment the following line:
TURNSERVER_ENABLED=1That’s it! coTURN install is complete. Now you have an up and runnning TURN server!
Testing Your TURN Server
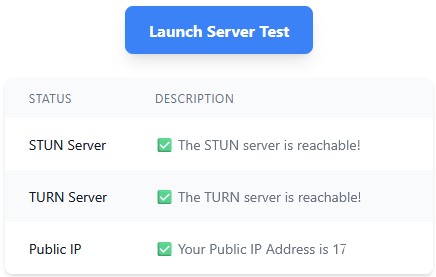
To test your coTURN server, you can use Turn Server Testing Tool. Go to metered.ca webpage and enter following:
STUN or TURN URI : turn:Your Public IP Address:3478
TURN username: myusername
TURN password: mypassword
Then click Add Server button and then click Launch Server Test button. If everything works well, you should see Done as final result.
Ins0mniA
Install RustDesk Server docker-compose.
https://github.com/lejianwen/rustdesk
 networks:
   rustdesk-net:
     external: false
 services:
   rustdesk:
     ports:
       - 21114:21114
       - 21115:21115
       - 21116:21116
       - 21116:21116/udp
       - 21117:21117
       - 21118:21118
       - 21119:21119
     image: lejianwen/rustdesk-server-s6:latest
     environment:
       - RELAY=<relay_server[:port]>
       - ENCRYPTED_ONLY=1
       - MUST_LOGIN=N
       - TZ=Europe/Athens
       - RUSTDESK_API_RUSTDESK_ID_SERVER=<id_server[:21116]>
       - RUSTDESK_API_RUSTDESK_RELAY_SERVER=<relay_server[:21117]>
       - RUSTDESK_API_RUSTDESK_API_SERVER=http://<api_server[:21114]>
       - RUSTDESK_API_KEY_FILE=/data/id_ed25519.pub
       - RUSTDESK_API_JWT_KEY=xxxxxx # jwt key
     volumes:
       - /data/rustdesk/server:/data
       - /data/rustdesk/api:/app/data #Mount the database
     networks:
       - rustdesk-net
     restart: unless-stopped
Ins0mniA
RAG + Embedding with AnythingLLM and Ollama
AnythingLLM - is an all-in-one AI application that simplifies the interaction with Large Language Models (LLMs) for business intelligence purposes. It allows users to chat with any document, such as PDFs or Word files, using various LLMs, including enterprise models like GPT-4 or open-source models like Llama and Mistral.
Ollama - we introduce this in the last blog. We will use its ability to service multiple Open Source LLMs via its API interface.
Here is a quick outline:
- Details about docker containers for Ollama (Platform/Server) and AnythingLLM (front end/chat/uploading documents).
- Explore:
- Embedding a news article about recent US political events.
- Vector database (Lance DB) - you can spin up chroma if you like, but Lance DB comes bundled with AnythingLLM.
- Query the LLM about the news article and assess how well it did.
A lot of the above is built into AnythingLLM.
Components used
- Ollama Server - a platform that make easier to run LLM locally on your compute.
- Open WebUI - a self-hosted front end that interacts with APIs that presented by Ollama or OpenAI compatible platforms. I am using to download new LLMs much easier to manage than connecting to the ollama docker container and issuing ‘ollama pull’.
- AnythingLLM - an all-in-one AI application that simplifies the interaction with Large Language Models (LLMs).
- Linux Server or equivalent device - spin up three docker containers with the Docker-compose YAML file specified below.
Code break down
Analysis of Docker-Compose.yml file
services:
  ollama-server:
    image: ollama/ollama:latest
    container_name: ollama-server
    ports:
      - "11434:11434"
    volumes:
      - ./ollama_data:/root/.ollama
    restart: unless-stopped

  ollama-webui:
    image: ghcr.io/ollama-webui/ollama-webui:main
    container_name: ollama-webui
    restart: unless-stopped
    environment:
      - 'OLLAMA_BASE_URL=http://ollama-server:11434'
    volumes:
      - ./webui:/app/backend/data
    ports:
      - "3010:8080"
    extra_hosts:
      - host.docker.internal:host-gateway

  anything-LLM:
    image: mintplexlabs/anythingllm:latest
    container_name: anything-llm
    cap_add:
      - SYS_ADMIN
    restart: unless-stopped
    environment:
      - SERVER_PORT=3001
      - UID='1000'
      - GID='1000'
      - STORAGE_DIR=/app/server/storage
      - LLM_PROVIDER=ollama
      - OLLAMA_BASE_PATH=http://ollama-server:11434
      - OLLAMA_MODEL_PREF='phi3'
      - OLLAMA_MODEL_TOKEN_LIMIT=4096
      - EMBEDDING_ENGINE=ollama
      - EMBEDDING_BASE_PATH=http://ollama-server:11434
      - EMBEDDING_MODEL_PREF=nomic-embed-text:latest
      - EMBEDDING_MODEL_MAX_CHUNK_LENGTH=8192
      - VECTOR_DB=lancedb
      - WHISPER_PROVIDER=local
      - TTS_PROVIDER=native
      - PASSWORDMINCHAR=8
    volumes:
      - ./anythingllm_data/storage:/app/server/storage
      - ./anythingllm_data/collector/hotdir/:/app/collector/hotdir
      - ./anythingllm_data/collector/outputs/:/app/collector/outputs
    ports:
      - "3001:3001"
    extra_hosts:
      - host.docker.internal:host-gateway
Line 6 - Ollama Server exposes port 11434 for its API.
Line 8 - maps a folder on the host ollama_data to the directory inside the container /root/.ollama - this is where all LLM are downloaded to.
Line 16 - environment variable that tells Web UI which port to connect to on the Ollama Server. Since both docker containers are sitting on the same host we can refer to the ollama container name ‘ollama-server’ in the URL.
Line 18 - maps a folder on the host webui to the directory inside the container /app/backend/data - storing configs.
Line 20 - Connect to the Web UI on port 3010.
Line 21-22 - Avoids the need for this container to use ‘host’ network mode.
Line 30 - Environmental variable that are used by AnythingLLM - more can be found at ENV variables Note the Base_Path to ollama refers to the ollama container listed above in the docker compose file.
Line 47 - AnythingLLM uses a lot of volume mapping. They may make changes to this later, the last two collector was a recent addition, so it will depend on the version of the docker image that gets pulled. Since it is set to ‘latest’
My directory structure in the folder where docker compose exist. Create these folders before starting the ‘docker compose’ commands.
Issue ‘docker compose up -d’ from the folder where your docker compose YAML file sits, to install and start the containers. Once the containers are up, you can browse to the AnythingLLM on port 3001 - example http://x.x.x.x:3001
Ins0mniA
Install Ntfy server on Debian linux.
The below guide is to install ntfy server on a self-hosted Debian linux.
1. Install the Ntfy Server.
Go on the root folder
cd /rootMake the install script file
nano install-ntfy.shcopy and paste the below code
#!/bin/bash

# Update package lists and upgrade existing packages
apt update && apt dist-upgrade -y

# Install required packages for HTTPS transport, curl, and GPG
apt install -y apt-transport-https curl gpg

# Create directory for GPG keyrings if it doesn't exist
mkdir -p /etc/apt/keyrings

# Download the public key and store it securely
curl -fsSL https://archive.heckel.io/apt/pubkey.txt | gpg --dearmor -o /etc/apt/keyrings/archive.heckel.io.gpg

# Add the repository to sources list if not already present
REPO_FILE="/etc/apt/sources.list.d/archive.heckel.io.list"
if [ ! -f "$REPO_FILE" ]; then
    echo 'deb [arch=amd64 signed-by=/etc/apt/keyrings/archive.heckel.io.gpg] https://archive.heckel.io/apt debian main' > "$REPO_FILE"
fi

# Update package lists again to include new repository
apt update

# Install ntfy from the repository
apt install -y ntfy

# Enable and start the ntfy systemd service for automatic startup
systemctl enable ntfy
systemctl start ntfy
Press Ctrl + x to save then press y and press enter
Make the script executable
chmod +x install-ntfy.shExecute the install-ntfy.sh and install Ntfy Server
./install-ntfy.shSetting up Ntfy configuration
The ntfy config files, both for server and clients are store at /etc/ntfy
Now go to that path
# Go to the ntfy directory
cd /etc/ntfy
# List the files inside the ntfy directory
ls -al
Configuring Ntfy Server
Before we continue with the server configuration yaml file, let's make a copy first of the example server.yml then we will work the original file not the bak. We will keep ONLY the setting we need for now for make the server.yml simplier. If need extra configuration then check the server.yml.bak file that have all the settings and explanations for them.
You can also check the documentation https://push.greenhome.stream/docs/
# Make a backup copy of the orignal file server.yml
cp server.yml server.yml.bak
# Edit the server.yml file
nano server.yml
Press Ctrl + k and holded until you erase all line from the server.ym file.
Copy and paste the below example setting and change them according to your needs.
## Base settings
base-url: "http://your-ip.or-domain.com"
listen-http: ":80"
# listen-https:
# key-file: <filename>
# cert-file: <filename>

## Auth settings
auth-file: /var/lib/ntfy/user.db
auth-default-access: "deny-all"
enable-signup: true
enable-login: true
# enable-reservations: false
# auth-startup-queries:

## Proxy
behind-proxy: true

## Cache file
cache-file: "/var/cache/ntfy/cache.db"
cache-duration: "24h"

## Cache attachment size
attachment-cache-dir: "/var/cache/ntfy/attachments"
attachment-total-size-limit: "5G"
attachment-file-size-limit: "150M"
attachment-expiry-duration: "24h"

## ios
upstream-base-url: "https://ntfy.sh"

## Logs settings
log-level: info
log-format: json
log-file: "/var/log/ntfy.log"
You have to create the ntfy.log file and give it permission of the ntfy user.
## Create the log file
touch /var/log/ntfy.log
## Assign permission to ntfy user
chown ntfy:ntfy /var/log/ntfy.log
Now you have to restart the ntfy service for the changes to be apply.
systemctl restart ntfyNow go to your instance where is hosted ntfy server refresh the browser and you will up-right a Sign IN and Sign UP buttons, to sign up and start to make use of the ntfy.
Add users.
You can add user from the Web UI by sign up OR you can add user from the command cli of the host where ntfy is hosted.
At the below example we add a user with a name xristina
ntfy user add xristinaAnd then it will prompt you to put the password for the user you want to add. This user is create like a simple user that means it can create topics but it can read/write topics only that user create. To have access to other topics so it can read or read/write them you must give his that access, check below Give access to user.
List users.
To list the users run the below command.
ntfy user listChange the Role of a user.
You can change the role of a use from the command cli with the below commands.
At the below example we change role to user xristina to be admin
Roles are : admin, pro, user,
ntfy user change-role xristina adminGive access to user for a topic to read or read/write.
At the below example we give access to user xristina to topic test
ntsy access xristina test rwIns0mniA
Εγκατάσταση του Caddy reverse proxy σε LXC container στο Proxmox.
Παρακάτω θα σου δείξω αναλυτικά βήμα προς βήμα πώς να εγκαταστήσεις το Caddy reverse proxy σε LXC container στο Proxmox, καθώς και πώς να προσθέτεις domains με παραδείγματα.
🚀 Λήψη και εκτέλεση σε μία γραμμή
apt update && apt install -y curl && clear && curl -s https://docs.greenhome.stream/attachments/39 | bashOR
apt update && apt install -y wget && clear && wget -q https://docs.greenhome.stream/attachments/39 && bash caddy-install.sh && rm -f caddy-install.sh✅ ΠΡΟΫΠΟΘΕΣΕΙΣ
- Έχεις ένα Proxmox server σε λειτουργία.
- Έχεις (ή θα δημιουργήσεις) ένα LXC container με Debian 11 ή 12 (ή Ubuntu).
- Έχεις κατοχυρωμένο domain name και δυνατότητα να προσθέτεις/αλλάζεις A records.
- Έχεις εξωτερική IP ή κάνεις port forwarding σε router.
- Ο LXC container έχει δικαιώματα internet και δυνατότητα να κάνει bind σε ports 80/443.
🔧 ΜΕΡΟΣ 1: Δημιουργία LXC Container για Caddy
Βήμα 1: Δημιουργία LXC Container από GUI
- Άνοιξε το Proxmox GUI.
- Πήγαινε Create CT.
-
Συμπλήρωσε:
- Hostname:
caddy - Template:
Debian 12(ή 11) - Disk Size: π.χ. 4GB
- CPU/RAM: 1 core / 512MB RAM
- Network: NAT ή bridged, ανάλογα τη ρύθμιση σου.
- Hostname:
-
Enable nesting (σημαντικό!):
- Μετά τη δημιουργία, πήγαινε στο
Options > Features > Nestingκαι ενεργοποίησέ το.
- Μετά τη δημιουργία, πήγαινε στο
🧰 ΜΕΡΟΣ 2: Εγκατάσταση του Caddy
Μπαίνουμε στο container:
pct enter <CTID> # π.χ. pct enter 103Ενημερώνουμε το σύστημα:
apt update && apt upgrade -yΒήμα 2: Εγκατάσταση του Caddy (από το επίσημο repo)
apt install -y debian-keyring debian-archive-keyring curl
curl -1sLf 'https://dl.cloudsmith.io/public/caddy/stable/gpg.key' | gpg --dearmor -o /usr/share/keyrings/caddy-archive-keyring.gpg

curl -1sLf 'https://dl.cloudsmith.io/public/caddy/stable/debian.deb.txt' | \
tee /etc/apt/sources.list.d/caddy-stable.list

apt update
apt install caddy -y
Επιβεβαίωση εγκατάστασης:
caddy version🚀 ΜΕΡΟΣ 3: Παραμετροποίηση Reverse Proxy
Η κύρια ρύθμιση του Caddy γίνεται μέσω του Caddyfile.
Ο Caddyfile βρίσκεται συνήθως εδώ:
/etc/caddy/Caddyfile🔄 ΠΑΡΑΔΕΙΓΜΑ Reverse Proxy για ένα domain
Έστω ότι έχεις το domain:
example.com → δείχνει στην IP του Proxmox server σουΚαι έχεις ένα web service π.χ. ένα container/VM με IP 192.168.100.50 που ακούει στο port 8080.
Βήμα 1: Αλλαγή Caddyfile
Άνοιξε το αρχείο:
nano /etc/caddy/CaddyfileΠροσθέτεις:
example.com {
    reverse_proxy 192.168.100.50:8080
}
Ο Caddy θα:
- Ακούει στο
example.com(στο port 80/443). - Θα πάρει αυτόματα SSL certificate μέσω Let's Encrypt.
- Θα κάνει reverse proxy στο 192.168.100.50:8080.
Βήμα 2: Επανεκκίνηση Caddy
systemctl restart caddyΈλεγξε αν τρέχει σωστά:
systemctl status caddy🌐 ΡΥΘΜΙΣΕΙΣ DNS
Για να δουλέψει το παραπάνω:
- Πήγαινε στον DNS provider σου (Cloudflare, Namecheap, GoDaddy, κ.λπ.).
-
Πρόσθεσε A Record:
- Name:
@ - Type:
A - Value:
η δημόσια IP του Proxmox server
- Name:
Αν έχεις το Caddy πίσω από router, σιγουρέψου ότι έχεις κάνει port forwarding για:
- TCP 80 → στον LXC container (ή στο Proxmox αν bridged)
- TCP 443 → το ίδιο
➕ ΠΩΣ ΠΡΟΣΘΕΤΩ ΝΕΟ DOMAIN (ή subdomain)
Απλά προσθέτεις νέο block στο Caddyfile.
Παράδειγμα:
example.com {
    reverse_proxy 192.168.100.50:8080
}

blog.example.com {
    reverse_proxy 192.168.100.51:8080
}

nextcloud.mydomain.com {
    reverse_proxy 192.168.100.52:443
    tls your@email.com
    header {
        Strict-Transport-Security "max-age=31536000;"
    }
}
Και πάλι κάνεις:
systemctl reload caddyή
caddy reload --config /etc/caddy/Caddyfile🛠 ΧΡΗΣΙΜΕΣ ΕΝΤΟΛΕΣ
| Εντολή | Περιγραφή |
|---|---|
caddy reload |
Φορτώνει νέο Caddyfile χωρίς restart |
caddy validate --config /etc/caddy/Caddyfile |
Ελέγχει για λάθη |
journalctl -u caddy -f |
Logs σε πραγματικό χρόνο |
caddy list-modules |
Λίστα ενεργών modules |
⚠️ ΣΥΧΝΑ ΠΡΟΒΛΗΜΑΤΑ
| Πρόβλημα | Λύση |
|---|---|
| "Caddy failed to obtain certificate" | DNS record δεν δείχνει σωστά ή port 80/443 μπλοκάρονται |
| "permission denied on port 80/443" | Ο LXC container δεν έχει capabilities (λύση παρακάτω) |
🔓 LXC: Δικαιώματα για ports 80/443
Αν έχεις πρόβλημα με το binding σε port 80/443, κάνε edit το LXC config:
nano /etc/pve/lxc/103.confΠρόσθεσε:
lxc.cap.drop:
lxc.apparmor.profile: unconfined
lxc.cgroup2.devices.allow: a
📦 Extra: Dynamic reverse proxy (wildcard domains)
Αν θέλεις να έχεις wildcard υποστήριξη (π.χ. *.example.com), μπορείς:
*.example.com {
    reverse_proxy 192.168.100.100:8080
}
Για wildcard SSL από Let’s Encrypt, χρειάζεται DNS plugin (π.χ. Cloudflare API).
✅ ΤΕΛΙΚΗ ΕΠΙΣΚΟΠΗΣΗ
| Στοιχείο | Περιγραφή |
|---|---|
| Caddy εγκατάσταση | apt install caddy από επίσημο repo |
| Reverse Proxy | Μέσα από /etc/caddy/Caddyfile |
| SSL | Αυτόματα από Let's Encrypt |
| Domains | Προσθήκη A records και blocks στο Caddyfile |
| Port Binding | Ίσως χρειαστεί unconfined LXC profile |
Ins0mniA
Install a full samba share on Debian.
A ready-to-run Bash script for Debian 12 that installs Samba, configures a standalone file server with one public (guest) and one private (authenticated) share, enables the required services, validates the config, and opens the UFW firewall rule if UFW is active. This follows Debian’s simple server guidance, includes sample smb.conf best practices, and uses testparm to verify the configuration before starting services.
What it does
- Installs Samba packages and utilities (samba, samba-common-bin, smbclient) needed for a file server on Debian 12 and checks smbd status to confirm installation.
- Enables and starts the smbd and nmbd services for SMB file sharing and NetBIOS name service on a standalone server, consistent with Debian’s simple server flow.
- Backs up the default smb.conf, writes a hardened standalone configuration (workgroup, server role, disable printing, guest mapping, usershare), and sets a minimum SMB protocol of SMB2 as documented in smb.conf references.
- Creates a public share at /srv/samba/public (guest read/write) and a private share at /srv/samba/private (group-restricted), with POSIX permissions, SGID for group inheritance, and ACL-friendly VFS options.
- Ensures the sambashare group exists, adds an optional UNIX user to that group, and registers the account in Samba’s database via smbpasswd -a for authenticated access.
- Validates the configuration with testparm and restarts services to apply changes, following common Samba setup checks.
- If UFW is installed and active, opens the “Samba” application profile (ports 137–139, 445), matching typical Debian/Ubuntu firewall examples for Samba.
Script
#!/usr/bin/env bash
# Full Samba file server setup for Debian 12 (Bookworm)
# - Creates public (guest) and private (authenticated) shares
# - Idempotent where possible
# - Run as root

set -euo pipefail

# Configurable defaults (override via environment)
WORKGROUP="${WORKGROUP:-WORKGROUP}"
SAMBA_GROUP="${SAMBA_GROUP:-sambashare}"
PUBLIC_DIR="${PUBLIC_DIR:-/srv/samba/public}"
PRIVATE_DIR="${PRIVATE_DIR:-/srv/samba/private}"
BACKUP_SUFFIX="$(date +%Y%m%d-%H%M%S)"

require_root() {
  if [ "${EUID:-$(id -u)}" -ne 0 ]; then
    echo "This script must be run as root."
    exit 1
  fi
}

install_packages() {
  export DEBIAN_FRONTEND=noninteractive
  apt-get update -y
  apt-get install -y samba samba-common-bin smbclient
}

enable_services() {
  systemctl enable --now smbd
  # nmbd provides NetBIOS name service/browsing; useful on many networks
  systemctl enable --now nmbd || true
  # winbind is optional for name resolution; enable but ignore errors if absent
  systemctl enable --now winbind || true
}

prepare_directories() {
  mkdir -p "$PUBLIC_DIR" "$PRIVATE_DIR"
  # Ensure group exists
  if ! getent group "$SAMBA_GROUP" >/dev/null; then
    groupadd -f "$SAMBA_GROUP"
  fi

  # Public: group-writable, guest access, inherit group via SGID
  chown root:"$SAMBA_GROUP" "$PUBLIC_DIR"
  chmod 2775 "$PUBLIC_DIR"

  # Private: group-restricted, authenticated users only, inherit group via SGID
  chown root:"$SAMBA_GROUP" "$PRIVATE_DIR"
  chmod 2770 "$PRIVATE_DIR"
}

write_smb_conf() {
  local conf="/etc/samba/smb.conf"
  if [ -f "$conf" ]; then
    cp -a "$conf" "${conf}.bak.${BACKUP_SUFFIX}"
  fi

  cat > "$conf" <<'EOF'
# Managed by setup script
# Reference: smb.conf(5)
[global]
   workgroup = WORKGROUP
   server role = standalone server
   netbios name = __NETBIOS_NAME__
   server string = Samba Server on %h
   map to guest = Bad User
   log file = /var/log/samba/log.%m
   max log size = 1000
   dns proxy = no

   # Usershares (optional; enables desktop-created shares if needed)
   usershare allow guests = yes

   # Disable printing support on a fileserver
   load printers = no
   printing = bsd
   printcap name = /dev/null
   disable spoolss = yes

   # Security hardening
   server min protocol = SMB2

   # Windows ACL compatibility on POSIX filesystems
   vfs objects = acl_xattr
   map acl inherit = yes
   store dos attributes = yes

[public]
   comment = Public Share (guest RW)
   path = __PUBLIC_PATH__
   browseable = yes
   read only = no
   guest ok = yes
   guest only = yes
   force user = nobody
   force group = __SAMBA_GROUP__
   create mask = 0664
   directory mask = 2775

[private]
   comment = Private Share (authenticated)
   path = __PRIVATE_PATH__
   browseable = yes
   read only = no
   valid users = @__SAMBA_GROUP__
   force group = __SAMBA_GROUP__
   create mask = 0660
   directory mask = 2770
   inherit permissions = yes
EOF

  # Substitute variables
  sed -i "s|WORKGROUP|${WORKGROUP}|g" "$conf"
  sed -i "s|__NETBIOS_NAME__|$(hostname -s)|g" "$conf"
  sed -i "s|__PUBLIC_PATH__|${PUBLIC_DIR}|g" "$conf"
  sed -i "s|__PRIVATE_PATH__|${PRIVATE_DIR}|g" "$conf"
  sed -i "s|__SAMBA_GROUP__|${SAMBA_GROUP}|g" "$conf"
}

add_optional_user() {
  echo
  read -r -p "Enter a UNIX username to grant private share access (leave blank to skip): " SAMBA_USER || true
  if [ -n "${SAMBA_USER:-}" ]; then
    if ! id "$SAMBA_USER" >/dev/null 2>&1; then
      # Create a local UNIX account without setting a system password
      adduser --disabled-password --gecos "" "$SAMBA_USER"
    fi
    usermod -aG "$SAMBA_GROUP" "$SAMBA_USER"
    echo "Set a Samba password for ${SAMBA_USER}:"
    smbpasswd -a "$SAMBA_USER"
  fi
}

check_and_restart() {
  echo "Validating Samba configuration with testparm..."
  testparm -s >/dev/null
  systemctl restart smbd
  systemctl restart nmbd || true
  systemctl restart winbind || true
}

maybe_open_firewall() {
  if command -v ufw >/dev/null 2>&1; then
    if ufw status | grep -qi "Status: active"; then
      ufw allow Samba || true
    fi
  fi
}

show_summary() {
  cat <<SUMMARY

Samba is installed and configured.

Shares:
  - \\\\$(hostname -s)\\public  (guest RW)
  - \\\\$(hostname -s)\\private (authenticated; users in group '${SAMBA_GROUP}')

Private-share access:
  - Add users with: usermod -aG ${SAMBA_GROUP} <user> && smbpasswd -a <user>

Validate:
  - testparm -s
  - systemctl status smbd

SUMMARY
}

main() {
  require_root
  install_packages
  enable_services
  prepare_directories
  write_smb_conf
  add_optional_user
  check_and_restart
  maybe_open_firewall
  show_summary
}

main "$@"
How to use
- Save the script as samba-setup.sh, mark it executable with chmod +x samba-setup.sh, and run it as root on a fresh Debian 12 system.
- During the run, optionally specify a UNIX account to grant private share access; the script adds it to the Samba group and registers it with smbpasswd -a for authentication.
- Access from Linux with smbclient, for example: smbclient //HOSTNAME/private -U USER, or test locally per Debian’s simple server guidance using smbclient commands.
Notes
- The services to manage on a standalone server are smbd (and optionally nmbd/winbind), and systemctl status smbd confirms the server daemon status on Debian 12.
- The configuration file is /etc/samba/smb.conf; test changes with testparm and consult the smb.conf(5) reference for parameters like workgroup, server role, and server min protocol.
- If UFW is enabled, the script opens the Samba profile; alternatively, iptables/nftables rules covering UDP 137–138 and TCP 139/445 can be used as demonstrated in Debian’s simple server page.
Ins0mniA